

If you need to feed a crowd of chocolate and coconut lovers, look no further! This cake combines both worlds in a simple cake recipe. Neither flavour is overpowering yet both are complimentary and delicate. This dessert will become a favourite for any occasion or gathering. Whether you’re celebrating a birthday, hosting a dinner party, or simply craving a decadent treat, this cake is sure to impress.
Making a 3 layered cake really ups the cake game; it’s impressive and really isn’t hard to do. You do need 3 cake pans to achieve this cake. It’s worth investing in 3 round cake pans so you always have the option of making a special cake when you need. And if you ask me a 3 layered cake has the perfect amount of cake to icing.

Ingredients
We all know and love chocolate cake, but what really makes this cake is the coconut buttercream icing and the toasted coconut. I prefer to bake with unsweetened coconut as the cake already has added sugar and it’s a nice balance using raw coconut. When it’s toasted the flavours amplify and become more intense. Using coconut extract is what gives the buttercream its true, coconutty flavour; so do not skip out on this step. You can find coconut extract at your local Bulk Barn Foods store.
- All-purpose flour
- Cocoa powder
- Granulated sugar & icing sugar
- Eggs
- Unsalted butter
- Sour cream
- Buttermilk
- Unsweetened shredded coconut
- Canned coconut milk
- Coconut extract
- Pure vanilla extract
- Baking powder & baking soda
- Salt

How To Toast Coconut
Toasting coconut brings out the nutty flavours and adds a little crunch to each bite. I prefer to toast coconut on the stovetop at medium to low heat. I find you have more control over how much or how little the coconut will brown than in the oven. It’s easy to go from a light golden colour to burnt in a matter of seconds. So, keeping a close eye is so important and I find consistently stirring and moving the coconut in the pan keeps this at bay to achieve the perfect toasted colour!
Tips For Assembling a Layered Cake
- Most importantly you want to work with partially or frozen cakes. Hot or warm cakes are soft, difficult to handle and easily crack and they are hard to stack, ice and to control crumbs.
- Line the bottom of your cake pans with parchment paper (cut parchment paper into 9-inch circles by tracing out the bottom of the pan with a pencil), and grease the side of the cake pans with butter. This is very important when building a layered cake. You need those layers to be intact and to come out clean from the pan.
- When dividing the batter into the cake pans, make sure the batter is evenly distributed. This will make for even baking and a level cake. If you have a scale, use it.
- Build your cake on a cake board or right on your cake plate. There’s nothing worse than building a cake and then trying to figure out how you are going to move it without ruining it!
- Stack your cakes upside down. Flip each cake so the bottom is on the top. This will create a flat and even cake.
- Use an offset spatula to ice your cake! The offset spatula makes it much easier to ice and your hand won’t get in the way to make those smooth lines.
- Use a cake lid! It’s best to store the cake at room temperature on the counter with the lid covering the entire cake. The fridge will actually dry out your cake. If it’s really hot in your house or humid, you may need to store it in the fridge or you risk your cake going rancid.
How To Make a Chocolate Coconut Cake
Step One: Line and grease three 9″ pans. Make your cake batter and evenly distribute it into your prepared pans. Bake 22-25 minutes rotating your pans halfway through the bake time. Let the cakes cool for 5 minutes and then pop the cakes into the freezer.


Step Two: Toast shredded coconut on the stovetop until the coconut just starts to brown. Remove from the heat and add to a separate bowl.


Step Three: Make your coconut buttercream icing. Take cakes out of the freezer and build your cake on a cake board or right on your cake stand. Place a dollop of icing in the middle of the board/cake stand. This is to keep your cake in place. Add your first cake layer.


Step Four: Add a heaping amount of icing and spread it out over the cake, letting the icing fall over the sides. Add the next cake layer and ice, letting the icing fall off the sides again. Add your top layer and add icing, again letting the icing fall off the sides.


Step Five: Ice the sides of the cake using an offset spatula. Make sure the icing is even and thick enough to press the coconut into the cake. Don’t worry about the icing being perfect, the coconut will cover the icing.

Step Six: Fill your palm with a handful of toasted coconut and add to the top of the cake first then the edges and lightly press in.


Step Six: Using your palm again fill with more coconut and lightly press coconut around the edges of the cake until the entire cake is covered in coconut. Use a pastry brush to swipe up any extra coconut.


Coconut Recipes You’ll Love
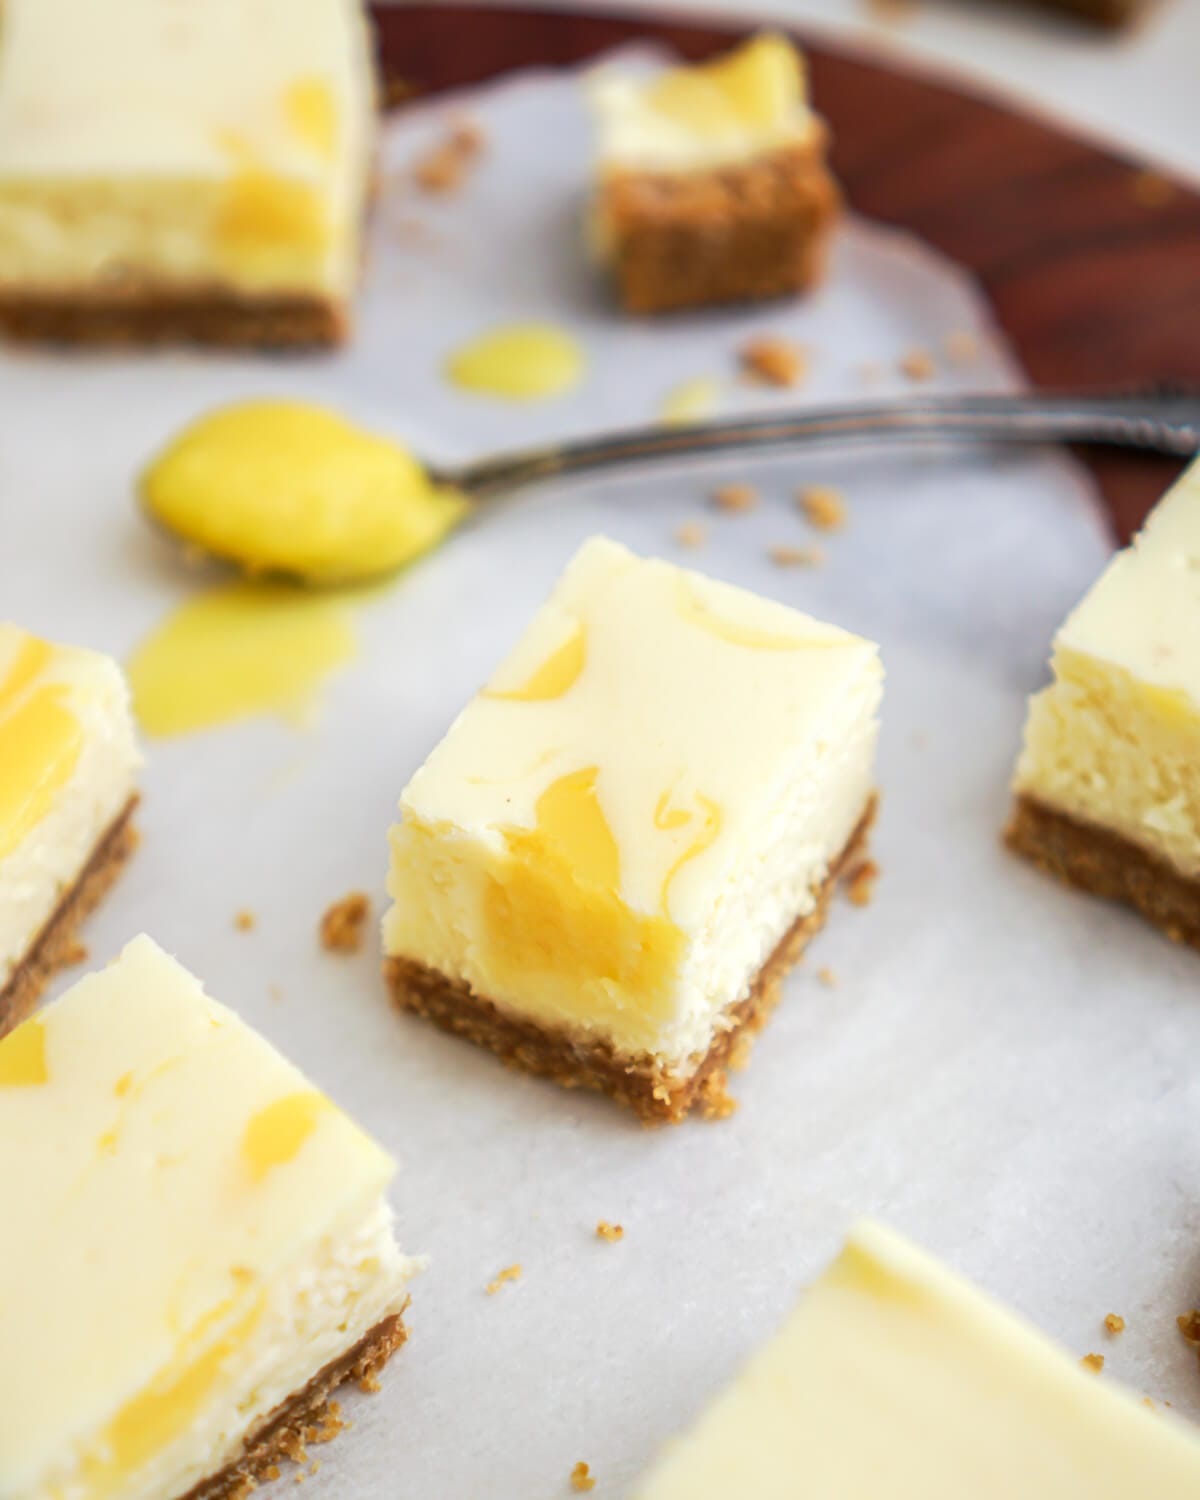
- Raspberry Coconut Squares
- Coconut Pineapple Cake
- Coconut Cream Pie
- Double Chocolate Coconut Yogurt Muffins
- No Bake Almond Coconut Energy Balls

Chocolate Coconut Cake
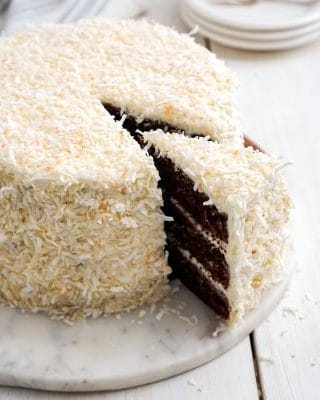
This chocolate coconut cake has 3 layers and has a soft and light chocolatey crumb. It’s slathered in coconut buttercream icing and covered in toasted, nutty coconut. It’s a fun change on a classic layered cake and is perfect for any occasion.
- Prep Time: 25 minutes
- Cook Time: 22 minutes
- Total Time: 47 minutes
- Yield: 18 1x
- Category: Cake
- Method: Baking
- Cuisine: American
Ingredients
Chocolate Cake
- 2 cups all-purpose flour, sifted
- 1/2 cup cocoa powder, sifted
- 1 teaspoon baking powder
- 1 teaspoon baking soda
- 1/2 teaspoon salt
- 1 cup unsalted butter, at room temperature
- 1 1/2 cups granulated sugar
- 2 large eggs, at room temperature
- 2 teaspoons pure vanilla extract
- 1/2 cup sour cream, at room temperature
- 1 cup buttermilk or soured milk*
Coconut Icing
- 1 1/2 cups unsweetened shredded coconut, toasted
- 1 cup plus 2 tablespoons unsalted butter, at room temperature
- 4 cups icing sugar, sifted
- 3 Tablespoons canned coconut milk
- 1 teaspoon coconut extract (or vanilla extract)
Instructions
- Preheat the oven to 350˚F. Line three, nine-inch cake pans with parchment paper, and butter/grease the sides. To line the cake pans, using a pencil trace the bottoms of the pan on parchment paper, cut out, and face the pencil side down in the cake pans. Set aside.
- In a large bowl add flour, cocoa powder, baking powder, baking soda and salt. Mix together and set aside.
- In a stand mixer, cream butter and sugar together until light and fluffy. Add eggs one at a time and continue to mix until well incorporated. Next, add vanilla and sour cream and continue to beat until well incorporated.
- Alternate the buttermilk and dry ingredients into your butter mixture in 2 additions just until incorporated, making sure to scrape down the bowl as needed.
- Divide batter equally into your prepared cake pans.
- Place all pans in the oven (on the same rack) and bake for 15 minutes. Rotate pans after 15 minutes and continue to bake for another 10-12 minutes or until a toothpick comes out clean.
- Let cakes cool on a cooling rack for 5 minutes then place them in the freezer (right in the pans).
- Meanwhile, toast your coconut in a large pan on the stovetop for approx. 5 minutes until it’s starting to brown and smells fragrant. Remove from heat and place into a bowl to cool. Be careful not to burn your coconut.
- Make your icing. In a stand mixer with the whisk attachment add icing sugar and butter together, mix on low. Slowly add coconut milk. Raise the speed to high and whip until soft peaks form. Add coconut extract. Note: add more butter for a creamier icing with less sweetness.
- Build your cake. Take cakes out of the freezer and remove them from cake pans (and parchment paper on the bottoms). Dust any crumbs off the cakes with a pastry brush. For an evenly stacked cake, trim cakes by using a bread knife to even out any cake domes that may have happened during baking.
- Build your cake on a cake board or right on your cake stand. Place a dollop of icing in the middle of the board/cake stand. This is to keep your cake in place. Add your first cake layer. Next, add a heaping amount of icing and spread it out over the cake, letting the icing fall over the sides.
- Add your next cake layer and ice, letting the icing fall off the sides again. Add your top layer and add icing, again letting the icing fall off the sides.
- Ice the sides of the cake, making sure the icing is even and thick enough to press the coconut into the cake.
- Fill your palm with a handful of toasted coconut and add to the top of the cake and edges, lightly pressing in.
- Remove any extra coconut around the cake with a pastry brush. Enjoy!
Notes
* Make your own buttermilk/soured milk by adding 1 tablespoon lemon juice to 1 cup milk.
Shake the coconut can before using.
The cake will last 3 days at room temperature stored in a cake dome or covered in plastic, or freeze for up to a month.
Nutrition
- Serving Size: 1 of 18
- Calories: 497
- Sugar: 44.4g
- Sodium: 313mg
- Fat: 28.9g
- Saturated Fat: 19.5g
- Unsaturated Fat: 0
- Trans Fat: 0
- Carbohydrates: 58.5g
- Fiber: 2.5g
- Protein: 4.2g
- Cholesterol: 78mg
FAQ’s
Yes, freeze any leftover coconut milk for up to two months. The easiest way to freeze coconut milk is to pour whatever is left into ice cube trays and freeze. This way you’ll have individual amounts of milk ready for drinks, cooking recipes or for baking.
Yes, this 3 layered, chocolate coconut cake can be made into a sheet cake. Grease and line a 9″ x 13″ cake pan and follow the directions for making the cake. Pour the entire batter into the sheet pan and bake. Bake times may differ so keep a close eye on the oven.
Yes, you can make a layered cake ahead of time but it’s best to build and ice the cake the same day. Simply wrap the cakes in plastic wrap and freeze the uniced cake layers for up to one month. On the day, make the icing and build the cake while the cake layers are partially frozen.
On average a 3 layer 9″ cake will serve 18 people.
This blog post has been sponsored by Bulk Barn Canada where you can find all your baking needs! All opinions are my own and I’m so happy to work with brands I love so I can continue to share these recipes with all of you! I hope you guys get to a Bulk Barn soon and try out this recipe.


Leave a Rating and Comment!
I love hearing from you! Leave a comment with any questions or how your recipe turned out (your email address will not be published)!