Mini Espresso Cake with Rosewater Buttercream
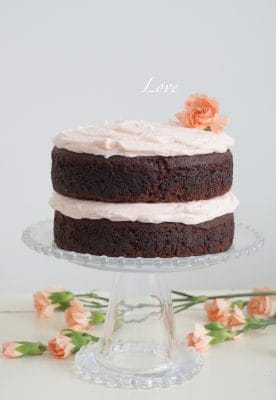
This 6″ mini cake is light and moist from the sour cream and espresso. It’s rich with chocolate and balanced with the floral extract of rosewater in the buttercream icing. This is a special dessert perfect for sharing (4 people).
- Prep Time: 30 mins
- Cook Time: 30 mins
- Total Time: 1 hour
- Yield: 1- 6 inch cake 1x
- Category: Dessert
- Method: Baking
- Cuisine: Persian
Ingredients
Cake
- 1/2 cup unsalted butter, at room temperature
- 1 cup granulated sugar
- 1 large egg
- 1/2 cup sour cream
- 1/4 teaspoon pure vanilla extract
- 1 cup all-purpose flour
- 1/4 cup sifted dark cocoa
- 1/2 teaspoon baking soda
- 1/4 teaspoon salt
- 1/2 cup brewed espresso or extra strong coffee
Icing
- 1/2 cup unsalted butter, at room temperature
- 3 cups sifted icing sugar
- 1/2 teaspoon rosewater extract
- 2–3 Tablespoons full milk or whipping cream
- 1 drop red food colouring
Instructions
- Brew your coffee or espresso and bring to room temperature (make it extra strong), set aside.
- Line two 6 inch round cake pans with parchment paper and set aside (grease the sides with oil).
- Preheat oven to 350˚F.
- In a mixing bowl, beat butter and sugar until light and fluffy. Add the egg, sour cream and vanilla extract. Beat until well incorporated and pale in colour.
- In a separate bowl whisk together flour, cocoa, baking soda and salt.
- Add your dry ingredients to your butter mixture, alternating with the brewed coffee making 2 additions.
- Pour batter into prepared pans, do your best to divide the batter evenly between the two pans (this is to ensure even baking for each cake).
- Place in the center of the oven and bake for 25-30 minutes. Let cool on a cooling rack for 5-10 minutes and then place the cakes (in pans) into the freezer. Meanwhile, make your icing.
- In a large mixing bowl beat butter, icing sugar, milk and rosewater extract until smooth and fluffy. Add one drop of red food colouring and beat until pale pink. Set aside.
- Take out cakes from the freezer and carefully remove them from the pans.
- Add approximately a tablespoon of icing to the center of your cake stand (this is so your cake won’t slide around when you are building it or cutting the cake). Place one of the cakes on top and press down. Spread a layer of icing on top of the cake and then carefully place the second cake on top. Add more icing to the top layer of the cake and smooth out.
- Top with fresh flowers and enjoy.
Notes
Freezing the cake helps limit the crumbs while building and icing the cake. A hot/warm cake from the oven crumbs easily and is more difficult to build.
Use a pastry brush to brush away crumbs while building your cake.
This cake is super moist, do your best to not overbake it. It will last you 3 days without drying out if you don’t overbake it.
If using real flowers on your cake remember to use pesticide-free and never stick the stems directly into the icing.
You can make the cake ahead of time and freeze for up to a week. Make icing the day of and ice the cake partially frozen.
You can easily double the recipe and make a large cake to feed a crowd.
Nutrition
- Serving Size: 1 serving of 8
- Calories: 607
- Sugar: 76.9g
- Sodium: 337mg
- Fat: 27.3g
- Saturated Fat: 17g
- Unsaturated Fat: 0
- Trans Fat: 0
- Carbohydrates: 91.7g
- Fiber: 1.2g
- Protein: 3.8g
- Cholesterol: 91mg