
*This blog post contains affiliate links, so we may earn a small commission when you make a purchase through links on our site at no additional cost to you.

As the clock ticks away the final moments of the year, there’s no better way to bring in the New Year than with a show-stopping NYE Countdown Vanilla Cake. This cake is more than just a yummy treat – it’s a fun centrepiece for your New Year’s Eve party!
This NYE cake has a moist crumb and is a classic vanilla layer cake that everyone will love. Not to mention, it pairs perfectly with a glass of bubbly champagne! It will no doubt be a big hit after your New Year’s Eve dinner menu and have your guests raving about it well into the new year.

Ingredients
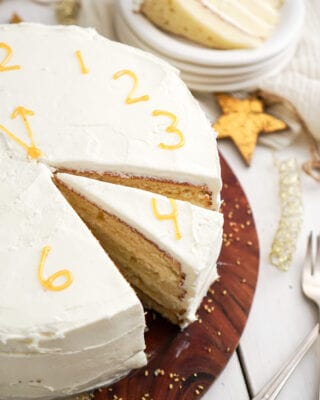
This classic vanilla cake is simple and sophisticated. What brings it to the next level is the clock design. I used a Wilton gold sparkle gel to make my clock. It comes in a tub so it’s easy to write with. I got mine at my local Bulk Barn store, where I also get all my dry ingredients. For my American friends, you can shop Wilton gels online.
- All-purpose flour
- Baking powder
- Salt
- Eggs & egg whites
- Unsalted butter
- Granulated sugar & icing sugar
- Pure vanilla extract
- Full milk (whole milk)
- Whipping cream
- Gold icing from Wilton
- Sparklers

Tips For a Perfect Vanilla Cake
- It’s very important to use room temperature ingredients .
- The recipes uses 2 cake pans, for best results use 4 cake pans if you have them. This will help with even baking and ensuring the cakes stay moist.
- It’s a good idea to freeze the cakes before cutting and layering. This helps with crumb control, and will make it easier to cut your cakes in half to create four layers. It will also be easier to stack and ice your cake.
- When cutting the cake layers in half, use a large bread or serrated knife (longer than the cake). Cut around all the edges first before slicing all the way through.
- Don’t overmix the cake batter, this will result in a dense cake.
- Rotate the pans halfway through baking time for even baking.
- Be careful not to overbake the cakes. Keep a close eye on the cakes at the 30 minute mark. If the middle of the cakes jiggle keep baking in small increments.
- For a flat even cake top, use the bottom of one of the cakes as the top layer.
- The best tool for icing a layered cake is an offset spatula.
More Cake Recipes
- Classic Chocolate Cake
- Coconut Cake
- White Chocolate Raspberry Cake
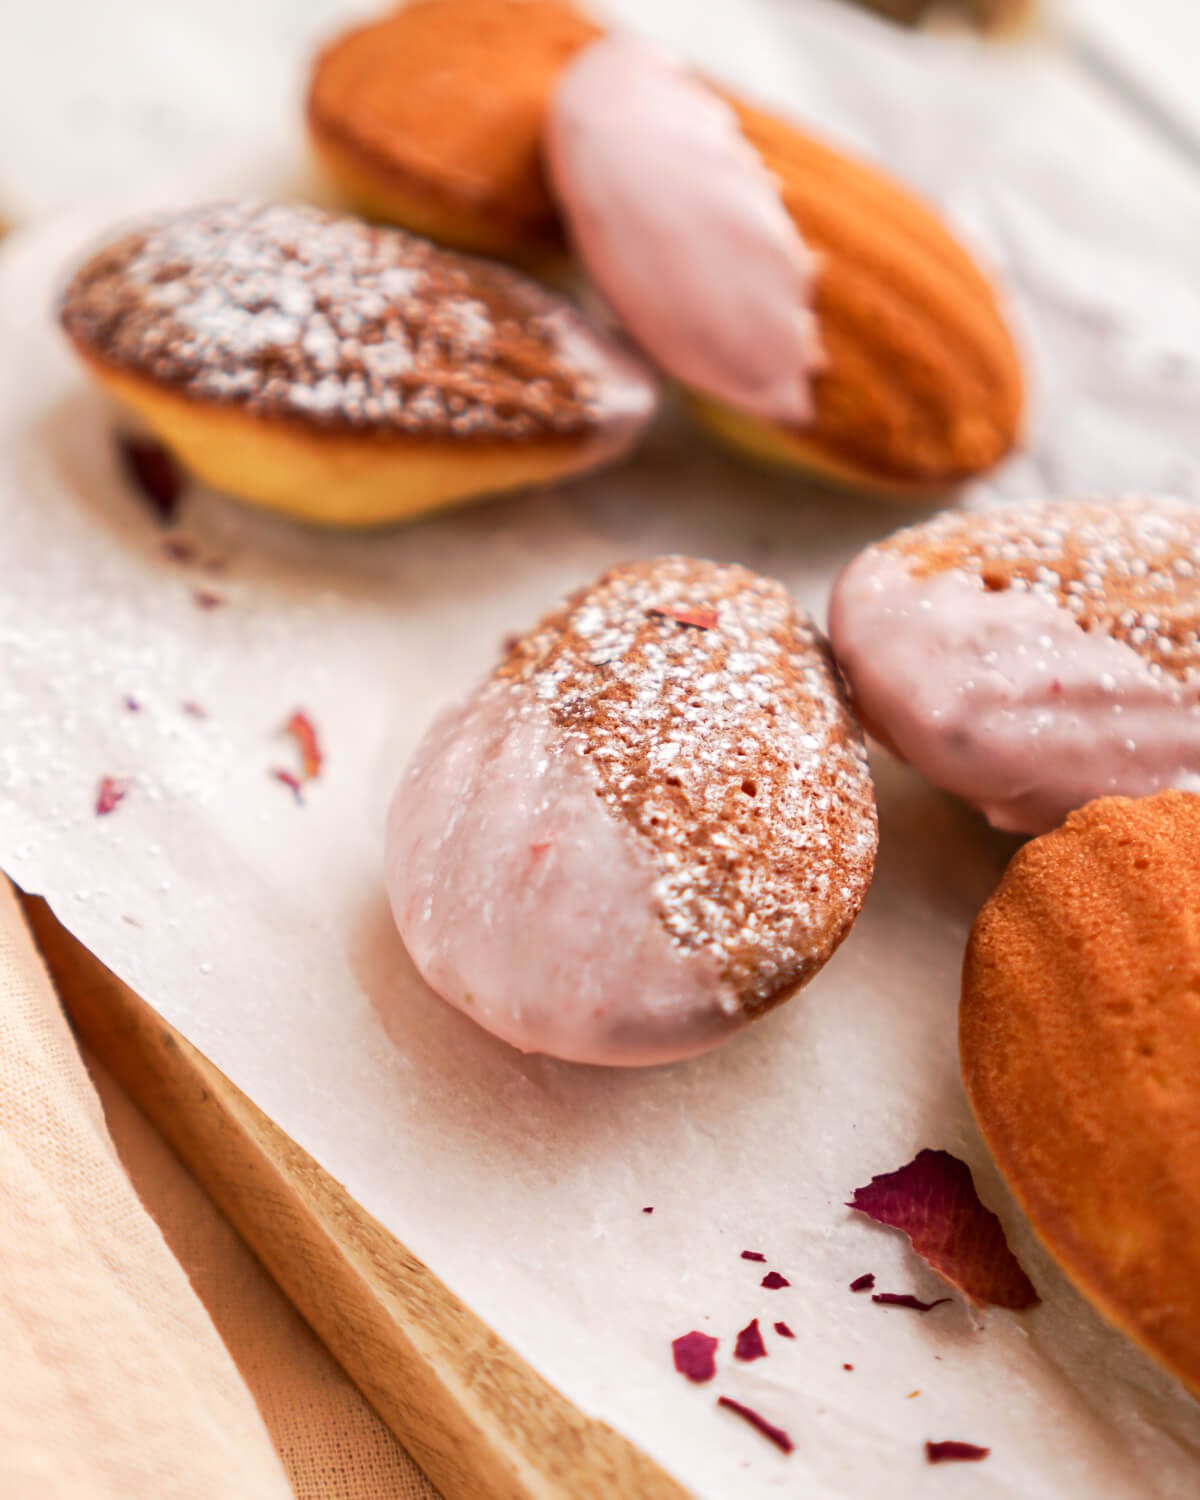
- Mini Espresso Cake with Rosewater Buttercream

How to Make a NYE Countdown Vanilla Cake
Step One: Make your cake batter. In a stand mixer fitted with the paddle attachment beat butter and sugar together. Slowly add the eggs in 2 to 3 additions, mixing well in between each addition. Add the vanilla. With the mixer on low speed, add the flour mixture in 3 additions alternating with the milk.
Step Two: Using a rubber spatula divide the batter evenly into the prepared cake pans (if you have a scale to weigh the cake pans use it as this will help with even baking). Bake in the oven for 35-38 minutes. Let the cakes cool on a cooling rack. Then, carefully remove the sides of the pans and place the cakes directly into the freezer to firm up.
Step Three: Meanwhile, make your icing. In a large bowl of a stand mixer, add icing sugar and butter. Using the whisk attachment, whisk until the mixture starts to come together. Slowly add the whipping cream. Whip until light, airy and fluffy. Add vanilla.
Step Four: Build your cake. Take the cakes out of the freezer and remove the bottoms of the cake pans as well as the parchment paper. Using a large bread knife, carefully trim the tops of the cakes to make flat, even layers. Then cut each cake in half lengthwise.
Step Five: Build your cake on a cake board or right on your cake stand. Add your first cake layer. Add a heaping amount of icing and spread out a thin layer of icing over the cake, letting lots of icing fall over the sides. Add your next cake layers and repeat (do this a total of 3 times). Add your top layer and add icing. Smooth the top so it’s flat and even. Using a large offset spatula run the spatula along the sides with the icing that is hanging off the cake.
Step Six: Decorate the cake. Use the gold icing to write numbers for a clock on the top of the cake. Start at the top and write 12, then the bottom 6, the two sides 3 and 9. Now fill in the rest and add hands just about to hit 12 o’clock. Add a sparkler, gold sprinkles, etc. and enjoy!


Cheers to a delightful and fun filled New Year’s Eve celebration!
PrintNYE Vanilla Cake
This 4 layered vanilla cake is a classic and feeds a crowd! It’s rich in flavour yet light and sophisticated. It’s the perfect NYE cake to ring in the New Year with family and friends!
- Prep Time: 1 hour 15 minutes
- Cook Time: 35 minutes
- Total Time: 1 hour 50 minutes
- Yield: 28 1x
- Category: Cakes & Cupcakes
- Method: Baking
- Cuisine: American
Ingredients
- 4 cup all-purpose flour
- 1 Tablespoon baking powder
- 1 teaspoon salt
- 4 eggs, at room temperature
- 2 egg whites, at room temperature
- 1 1/4 cups unsalted butter, at room temperature
- 2 1/3 cups granulated sugar
- 1 Tablespoon pure vanilla extract
- 2 cups full milk, at room temperature
Vanilla Buttercream Icing
- 4 1/2 cups icing sugar, sifted
- 1 cup unsalted butter, at room temperature
- 1/3 cup whipping cream
- 1 teaspoon pure vanilla extract
Decorating
- Gold icing from Wilton
- Sparklers
Instructions
- Preheat oven to 350˚F. Line the bottoms of two, 9″ springform cake pans with parchment paper and grease the sides of the pans with butter. Set aside.
- Make your cake. In a medium bowl add flour, baking powder and salt. Mix to combine and set aside.
- In a small bowl whisk together the eggs and egg whites. Set aside.
- In a stand mixer fitted with the paddle attachment beat butter and sugar together until light and fluffy (make sure you are using a large bowl, this is a big cake). Slowly add the eggs in 2 to 3 additions, mixing well in between each addition and scraping down the sides of the bowl as necessary. Add the vanilla and beat until combined.
- With the mixer on low speed, add the flour mixture in 3 additions alternating with the milk. Mix just until combined between each addition. Again, scrape down the sides of the bowl as necessary.
- Using a rubber spatula divide the batter evenly into the prepared cake pans (if you have a scale to weigh the cake pans use it as this will help with even baking).
- Bake in the oven for 35-38 minutes or until the middle is set and a toothpick inserted in the middle comes out clean. Be careful not to overbake the cakes.
- Let cakes cool on a cooling rack for 5-10 minutes. Then, carefully remove the sides of the pans and place the cakes directly into the freezer for approx. 1 hour to firm up.
- Make your icing. In a large bowl of a stand mixer, add icing sugar and butter. Using the whisk attachment, whisk until mixture starts to come together. Slowly add the whipping cream and raise the speed to high. Whip until light, airy and fluffy, approx. 3 minutes. Add vanilla and mix to combine.
- Build your cake. Take the cakes out of the freezer and remove the bottoms of the cake pans as well as the parchment paper. Using a large bread knife, carefully trim the tops of the cakes to make flat even layers. Dust any crumbs off the cakes. Then cut each cake in half lengthwise, you should now have 4 cake layers.
- Build your cake on a cake board or right on your cake stand. Place a small dollop of icing in the middle of the board/cake stand. This is to keep your cake in place. Add your first cake layer. Next, add a heaping amount of icing and spread out a thin layer of icing over the cake, letting lots of icing fall over the sides.
- Add your next cake layers and repeat (do this a total of 3 times), letting the icing fall off the sides again. Add your top layer and add icing, again let the icing fall off the sides. Smooth the top so it’s flat and even.
- Using a large offset spatula run the spatula along the sides with the icing that is hanging off the cake.
- Decorate. Use the gold icing to write numbers for a clock on the top of the cake. Start at the top and write 12 , then the bottom 6 , the two sides 3 and 9. Now fill in the rest and add hands that are just about to hit 12 o’clock.
- Add sparkler and enjoy!
Notes
FAQ’s
Yes, you can definitely use this vanilla cake recipe for a sheet cake. You may want to cut the icing recipe in half and watch your bake time as it may differ. You will lose the clock design when doing a sheet cake.
Yes, you can easily make the cake layers ahead of time. Wrap the layers tightly in plastic wrap and into a freezer bag and freeze layers for up to one month.


Leave a Rating and Comment!
I love hearing from you! Leave a comment with any questions or how your recipe turned out (your email address will not be published)!